Getting Started for Local Development
Note
If you're new to Docker, please be aware that some resources are cached system-wide
and might reappear if you generate a project multiple times with the same name (e.g.
this issue with Postgres <docker-postgres-auth-failed>).
Prerequisites
- Docker
- docker-compose
- Python >= 3.8 to create virtual environment for
pre-commitpackage
1. Clone your fork and keep in sync with upstream master
git clone https://github.com/<your-github-username>/metagrid.git
Rebase your fork with upstream to keep in sync
# Add the remote, call it "upstream":
git remote add upstream https://github.com/aims-group/metagrid.git

# Fetch all the branches of that remote into remote-tracking branches
git fetch upstream

# Make sure that you're on your master branch:
git checkout master

# Rewrite your master branch so that any of your commits that
# aren't already in upstream/master are replayed on top of the
# other branch:
git rebase upstream/master
git push -f origin master
Checkout a new branch from master.
git checkout -b <branch-name> master
2. Set up pre-commit
This repo has default integration with pre-commit, a tool for identifying simple issues before submission to code review. These checks are performed for all staged files using git commit before they are committed to a branch.
2.1 Integrated Hooks (Quality Assurance Tools)
| Platform | Code Formatter | Linter | Type Checker |
|---|---|---|---|
| Python | black | flake8 | mypy |
| JavaScript/TypeScript | prettier | ESLint | N/A |
2.2 Install
# Create a python3 virtual environment using system-level Python.
# There may be alternative ways for you to do this.
python3 -m venv backend/venv

# Activate the virtual environment
source backend/venv/bin/activate

# Install local requirements
pip install -r requirements/local.txt

# Install pre-commit hooks
pre-commit install
Note: any update to .pre-commit.config.yml requires a reinstallation of the hooks
2.3 Helpful Commands
Manually run all pre-commit hooks
pre-commit run --all-files.
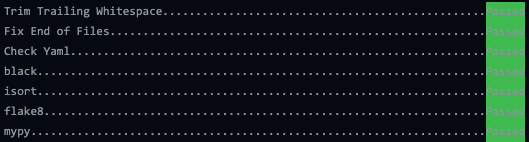
Run individual hook
# Available hook ids: trailing-whitespace, end-of-file-fixer, check-yaml, black, isort, flake8, mypy
pre-commit run <hook_id>.
3. Set up Back-end
3.1 Build and Run the Stack
This can take a while, especially the first time you run this particular command on your development system but subsequent runs will occur quickly:
docker compose up --build
3.2 Additional Configuration
Update /etc/hosts file
The backend Django service can be accessed by other containers over a shared network using its docker service name and port, django:5000. More information on how this works can be found in Docker's networking guide.
You will need to bind the hostname django to localhost to allow the browser to make requests to the backend Django service. Otherwise, it will not recognize the hostname and a network connection won't be established.
- Open your hosts file with admin privileges
- Mac/Linux:
/etc/hosts - Windows:
C:\Windows\System32\drivers\etc\hosts
- Mac/Linux:
- Append
127.0.0.1 djangoto the end of the file and save
Create user on Keycloak for authentication
This user will be used for logging into registered Keycloak clients, including the React and Django services.
- Head over to http://localhost:1337
- Login with admin credentials (automatically created)
- username: admin
- password: admin
- Follow the official Keycloak instructions to create a new user
3.3 Accessible Services
- Frontend: http://localhost:9443
- Keycloak: http://localhost:1337
- Docs: http://localhost:8001
3.4 Troubleshooting
Addressing Keycloak Boot Issue
Keycloak has a known fatal issue where if it is interrupted during boot (stopping docker compose up prematurely), the command that adds the admin user fails.
As a result, the Keycloak docker service will not start and outputs the error "User with username 'admin' already...".
If you run into this problem, follow these workaround steps:
-
Stop all back-end containers
docker compose down -
Comment out the two relevant lines in
docker-compose.yml:#KEYCLOAK_USER: admin#KEYCLOAK_PASSWORD: admin
-
Rebuild and restart the containers
docker compose up --build -
Un-do commenting
KEYCLOAK_USER: adminKEYCLOAK_PASSWORD: admin
Source:
4. Set up Front-end
4.1 Build and Run the Stack
This can take a while, especially the first time you run this particular command on your development system but subsequent runs will occur quickly:
docker compose up --build
4.2 Accessible Services
- React:
localhost:9443
VSCode Configuration
.vscode/settings.json files are provided to automatically configure your VSCode to leverage the quality assurance tools even if you use workspaces or open the folder directly.
Third Party Tool Integration
Code coverage: ![]()
Dependency Monitoring: ![]()

Docs: